Why use a drone?
Drones are a great way to provide inspection services for places that are in-accessible or where doing so in person might pose a safety issue. The department of commerce has a document describing code of practice for working at heights which includes stringent safety precautions for working at heights above 2 meters falling height. This can often increase the cost of getting a contractor to inspect multi storey structures to a point where using a drone to conduct the inspection is more cost effective.
Video vs Stills
While your first instinct may be to use aerial video to inspect a structure this is often not the best way to proceed. Most video from commercial drones is at maximum 4K resolution which equates to around 8 megapixels; while many drones can now capture still images that are in the vicinity of 20 megapixels. Using a structured method for capturing still images is the best way to conduct inspections with a drone. Higher resolution images allow the report writer to zoom in on the images to see finer details than what would be possible with even the highest resolution video. Another advantage is that structures are a lot easier to inspect when they are not moving! Added to that the ease at which a still image can be cropped and pasted into a report makes it a no brainier to use still photography for your inspection project over video provided you are not inspecting something that moves. For example you may be inspecting a conveyor belt to assess its tracking in which case video may be of interest.
All in the Lens
The biggest problem when using smaller drones like the Phantom or Mavic for inspection is the wide angle lens that they come with (around 20mm equivalent). These are great for landscape aerial photography where you want to fit a lot of landscape into each picture but for inspecting something in detail they are not ideal. A wide angle lens will make everything look smaller meaning to get anything useful you will need to fly at around 3 meters from the structure which can be very difficult when inspecting a structure or roof that may be 3 or more storeys high. Trust me flying at 3 meters from a structure 10+ meters in the air with wind turbulence coming off the walls is not something you want to be doing. For a successful inspections you generally want to be able to see small details such as cracks, rust, screws or welds while being able to fly at a safe distance. The ideal focal length for this type of work is around 50 – 70 mm which means you will need to run a camera with an interchangeable lens. By running a 60mm lens you are effectively “zooming” in on your structure without losing any detail. Compared to a 24mm lens you can now fly at a safe distance of 9 meters and still get a similar level of detail as you would running a 20mm lens flying at 3 meters. The longer (or higher number) the focal length the more detail you will be able to see. Some situations may require focal lengths close to 100mm if safety issues prevent the drone from getting close to the structure. Higher resolution cameras will also help increase image detail.
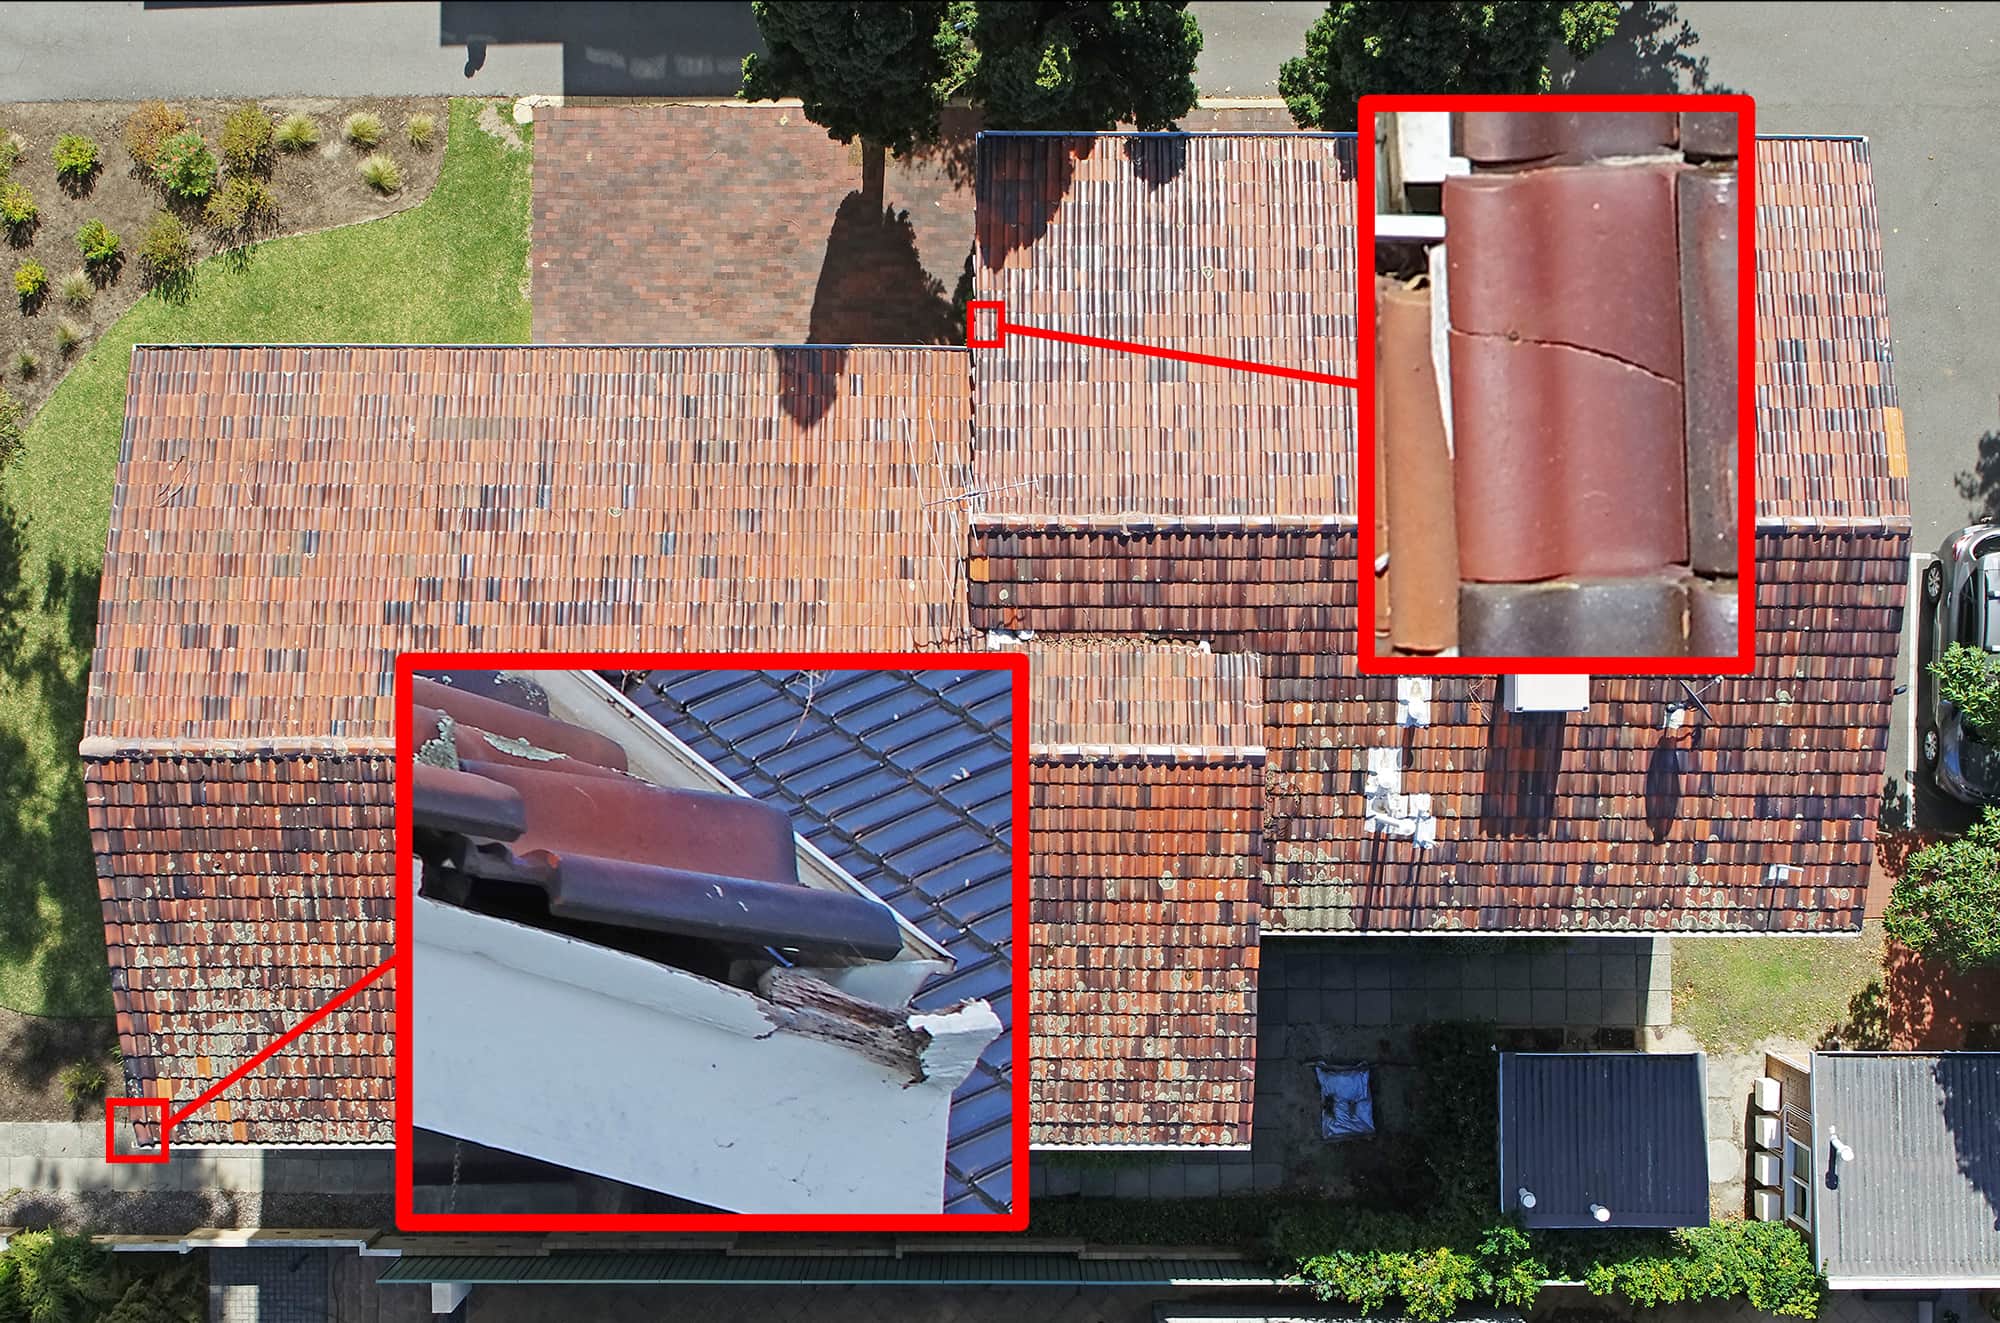
Now where was that broken roof tile?
Another important thing when carrying out an inspection is to have a clear method for capturing images before you start. After all if you can see the damage but don’t know where the image was taking its not worth much. Having a clear documented path for taking images is essential for being able to sort the images into something an assessor can make use of in the end.