Welcome to our DJI Zenmuse X7 review for professional aerial photography and video. We have only spent a few hours flying the X7 on our Inspire 2 so this will be a short review.
I will add updates as we spend a bit more time with it. I’m amazed at the lack of real world reviews and experience out there so I hope this will help some people out when making the decision on whether to purchase the X7. For now we only have the 16mm lens to test with which works out to be 24mm with the 1.5x crop factor.
A ROCKY START, FIRMWARE MADNESS
First off a WARNING! If you are running firmware version V01.01.0100 on your Inspire 2 DO NOT ATTACH THE CAMERA! This firmware does not recognise the X7 and will flash it with a firmware that will brick your expensive camera. You must first upgrade the firmware on the Inspire 2 WITHOUT the camera attached to a later version (even though it says in the release notes to upgrade the camera and aircraft together) either V01.01.0200 or V01.01.0300 will do at the time of writing this. After you upgrade the Inspire 2 it is recommended you attach the X7 and run the upgrade again to ensure everything is OK. Luckily we didn’t fall victim to this trap but the fun doesn’t stop there.
In my experience with the latest firmware V01.01.0300 the gimbal will not move to your commands either with the tilt wheel on the transmitter nor with a second slave controller connected. I messed with it for a long time trying to get it to work, re flashing, checking settings etc but nothing worked. The gimbal will stabilise fine and the camera will respond to shutter, exposure and other commands but you can not move the camera. After almost giving up and sending it back we decided to downgrade to firmware V01.01.0200 and presto everything works like a charm! It was a huge relief to see the thing tilting as I moved the tilt wheel for the first time!
At some point I will try the latest firmware again and see if I missed something but for now it works and I don’t have any more time to spend setting it up for the 20th time.
UPDATE 6 March 2018
After about 5 emails to DJI there is still no fix to this issue. They cant even confirm if there is a bug or not! Luckily my camera is still working a treat on the old firmware. Still disappointing for such a big investment that there is still no answer.
ASTHETICS
The DJI Zenmuse X7 looks great especially with its long carbon fiber lens, it looks like a serious camera. The lens does protrude quite far out and you need to take care when placing the Inspire 2 on the ground as it will hit the ground if its hanging down, which it will with the lens cap attached. I removed the weighted ring and attached the included clear protective ring and found it balanced perfect with the 16mm lens attached. The lens also comes with a nice hood which in addition to its optical properties prevents you from accidentally getting finger prints on the lens as often.
The box fits the X7 along with the lens attached which is nice yet the case is the same size as the X5s so it will fit in your existing Inspire 2 case. Attaching the lens has a notchy feeling as you turn it and the connectors mesh, this is normal but feels a bit uneasy the first time.
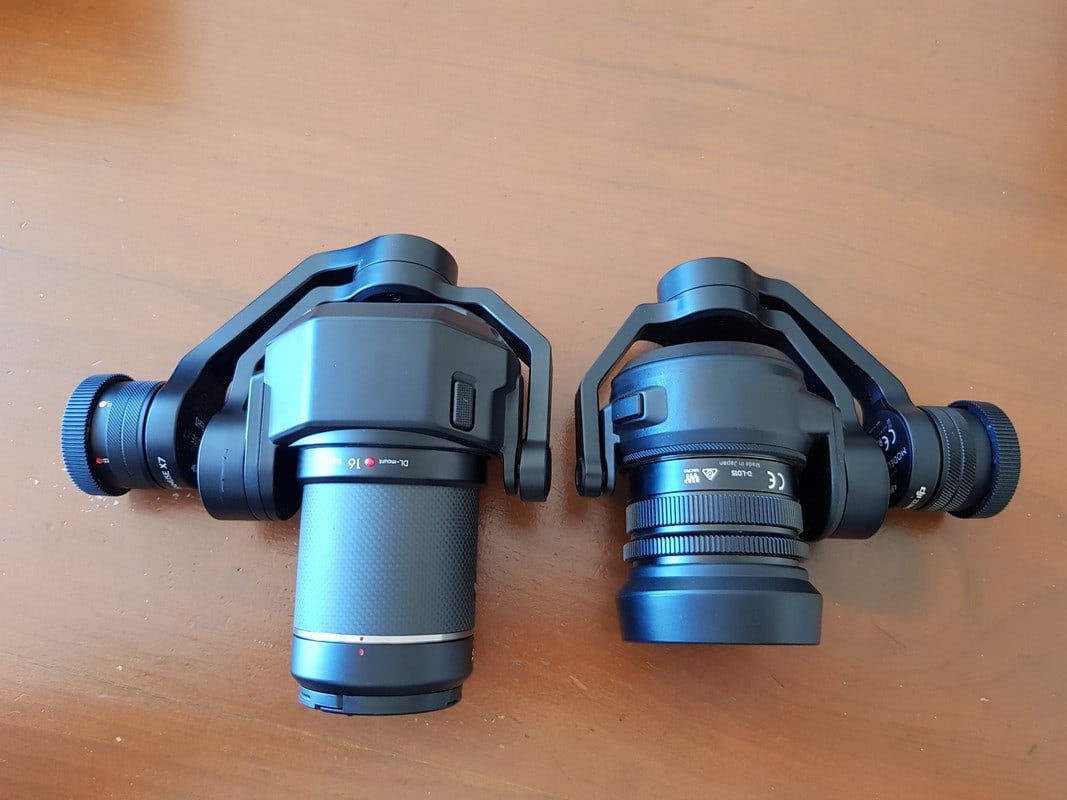
X7 vs X5S

X7 sensor on the left vs X5S sensor on the right
THE PICTURES
While this camera is marketed at aerial cinematography we actually bought it to be able to get better aerial photography without the need to bust out a great big ALTA and A7R. The X5S was always a bit lacking in my opinion when it came to photography. I have read that the X7 is a bit soft on focus but from what I have seen this is not the case. There is certainly less processing going on in the camera than the overly sharp looking Phantom 4 PRO pictures for example but with a bit of sharpening in post the photos look very good and hold up very well to editing. Its just not the sort of camera you will get amazing results straight off the SD card with but spend a few minutes in post and you will get amazing pictures especially working with the raws.
The 16mm lens is actually very good and stays crisp and sharp all the way to the edges which is lucky at that price! There is some distortion which is to be expected with such a wide lens but the horisons are straight and the images look great. Another bonus for the 16mm lens is that it has a built in ND4 filter that can be turned on and off from inside the DJI GO 4 app. No longer do you need to land to change between photo and video setup. The ND4 filter is enough to get you into the 1/60th or 1/50th shutter speeds required for shooting video while keeping the aperture below F10 in sunny conditions. The ND filter switch is unfortunately buried in the menu a bit deep but its a whole lot better than having to land that’s for sure.
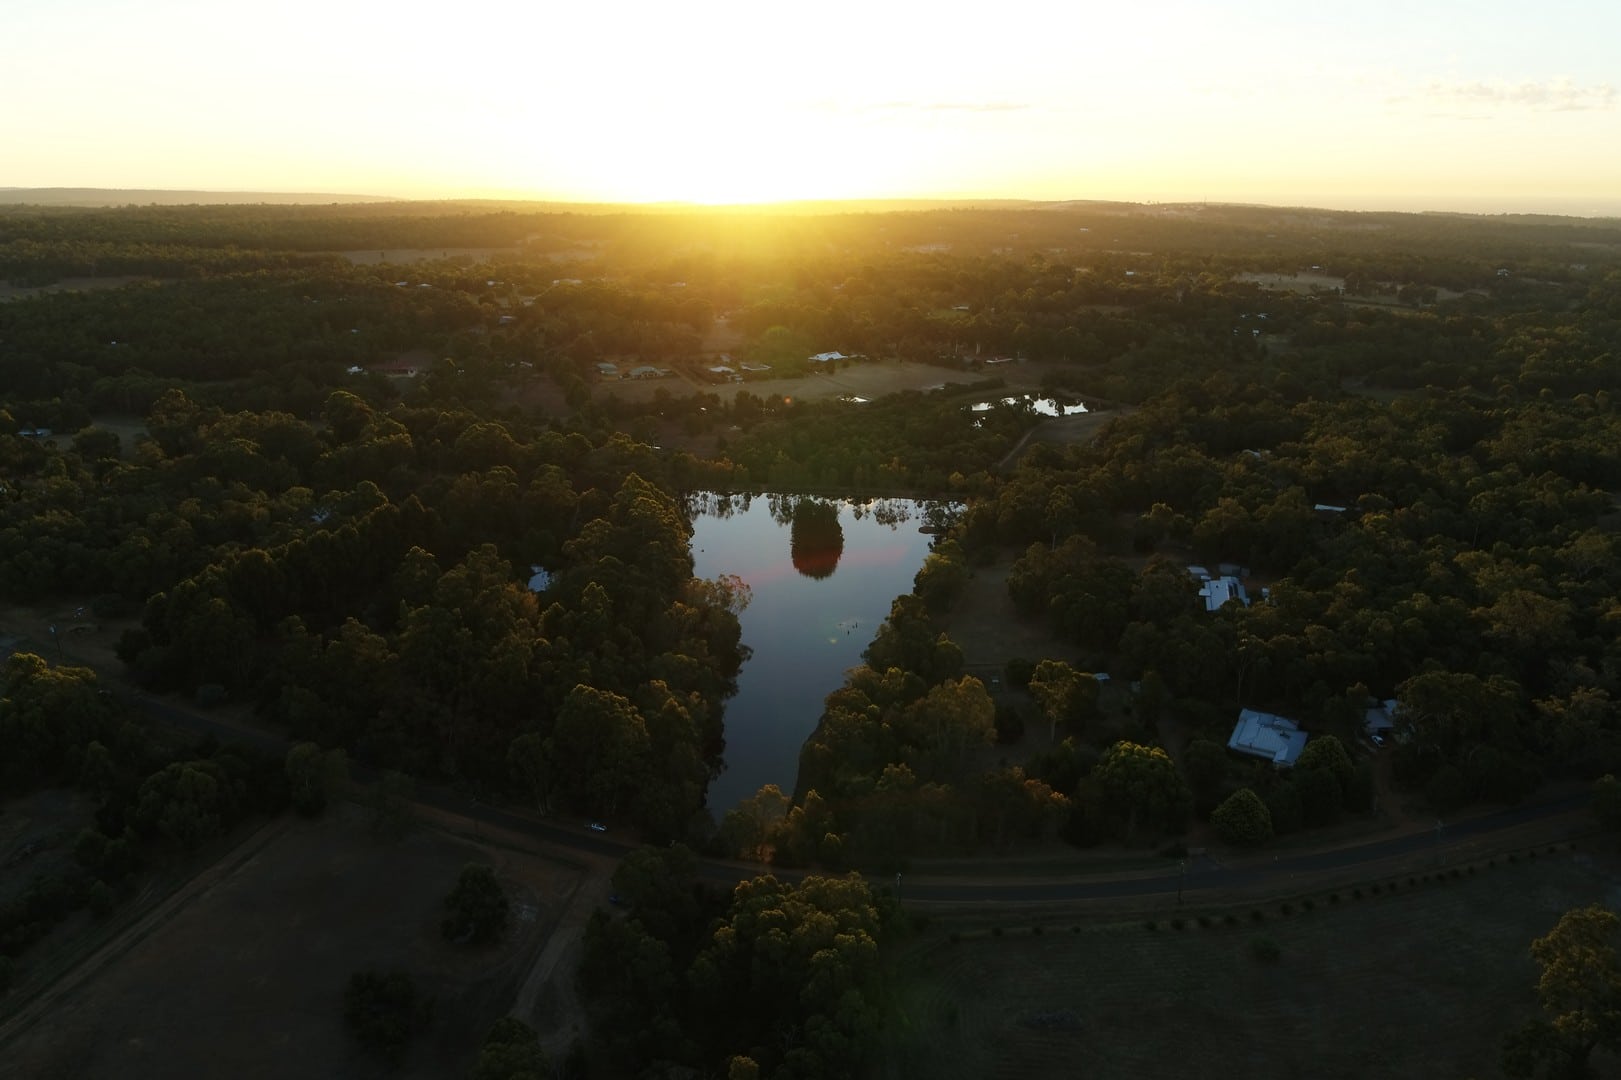
The APS-C sensor noticeably better dynamic range than the micro 4/3 unit found in the X5S and there is a remarkable lack of noise in the images. I shot some photos well before sunset directly into the sun and the results were quite impressive. The RAW images just had so much detail even in the most blown out and darkest parts of the image. Im quite fussy with noise but shooting at 800 ISO at night was not a problem, you can even push it to 1600 and get reasonable results. I have attached some photos below along with the RAW images so you can have a play for your self.
Original JPG Image

Same photo Edited from RAW
DOWNLOAD RAW IMAGE FILE FOR PHOTO ABOVE
VIDEO FOOTAGE
We did not spend the extra money on the SSD and CinemaDNG or ProRes license so I can not comment on the full potential of this camera. I can tell you that the additional dynamic range is noticeable in standard video recorded to the SD card. The footage is crisp and looks amazing. Moire effect also seems much reduced from the X5S. The gimbal is stable and holds the horizon very well. This is the most stable gimbal I’ve ever worked with and even when pushing the Inspire 2 to full speed the footage has no hint of jello or movement. Its quite an impressive feat. The X5S does very well in this regard too but the X7 is just a touch better, I think you will notice the difference with longer focal lengths where the X5S can start to show signs of movement. You can feel the extra strength in the motors when trying to push the camera by hand, the encoders are also a bit more accurate which adds to the stability of the X7.
UPDATE 6 March 2018
NIGHT AND LOW LIGHT PERFORMANCE
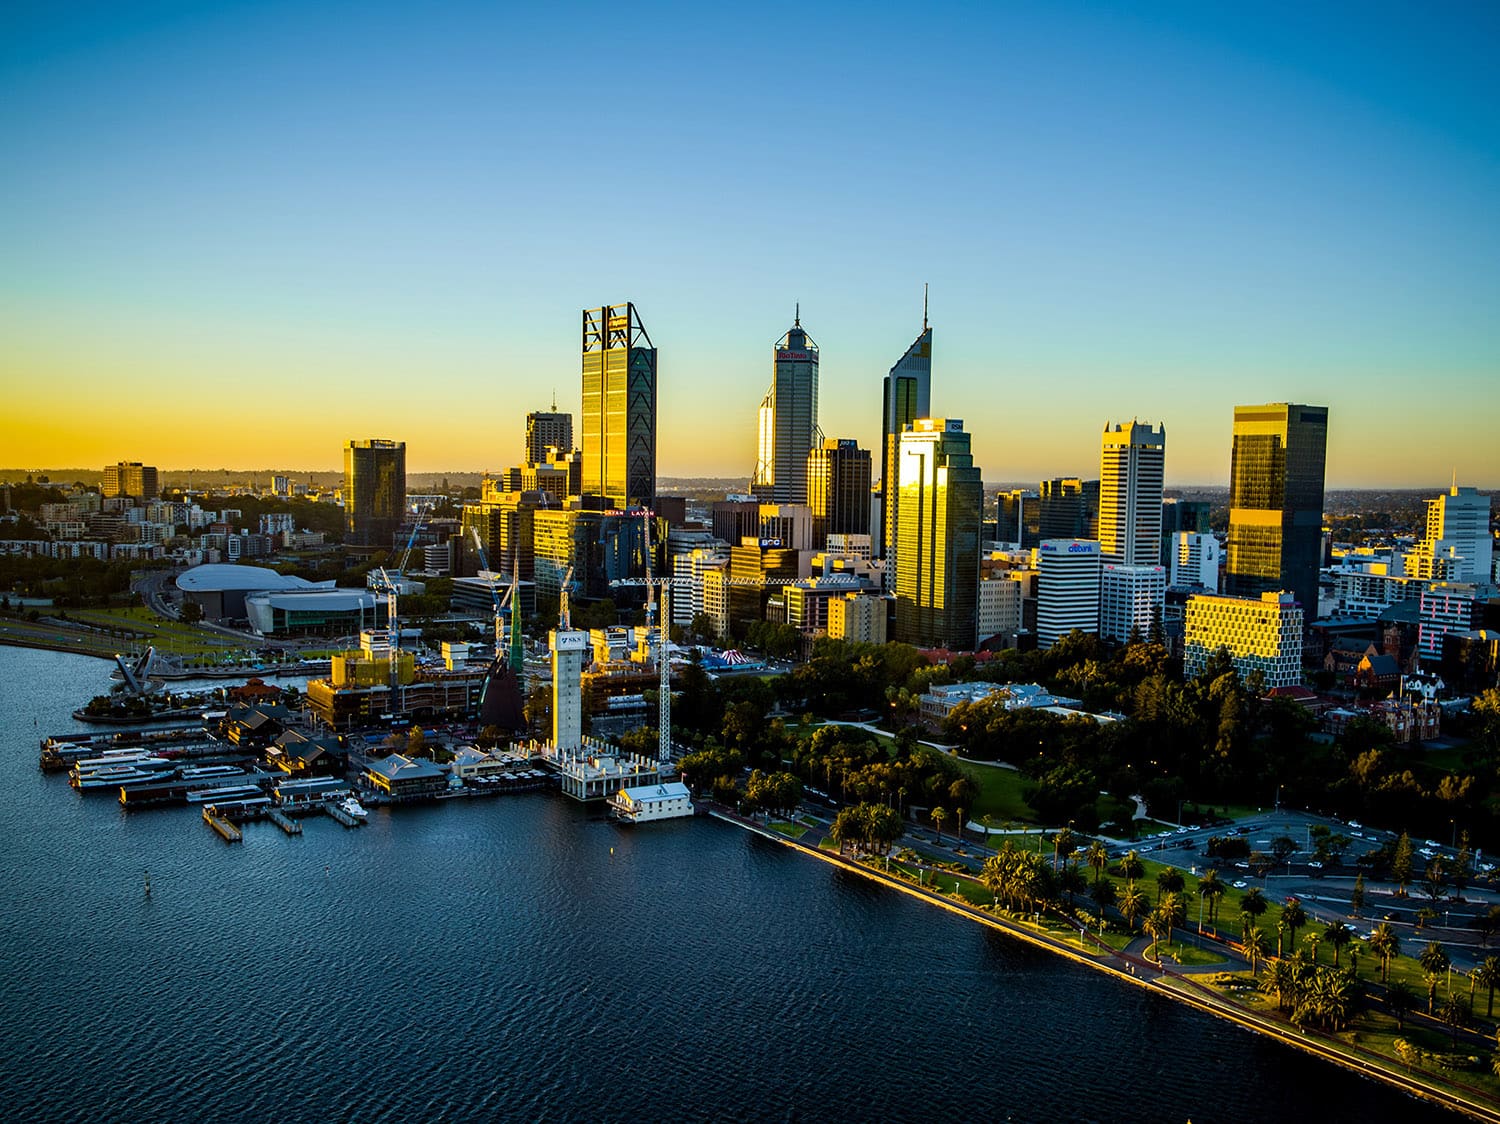
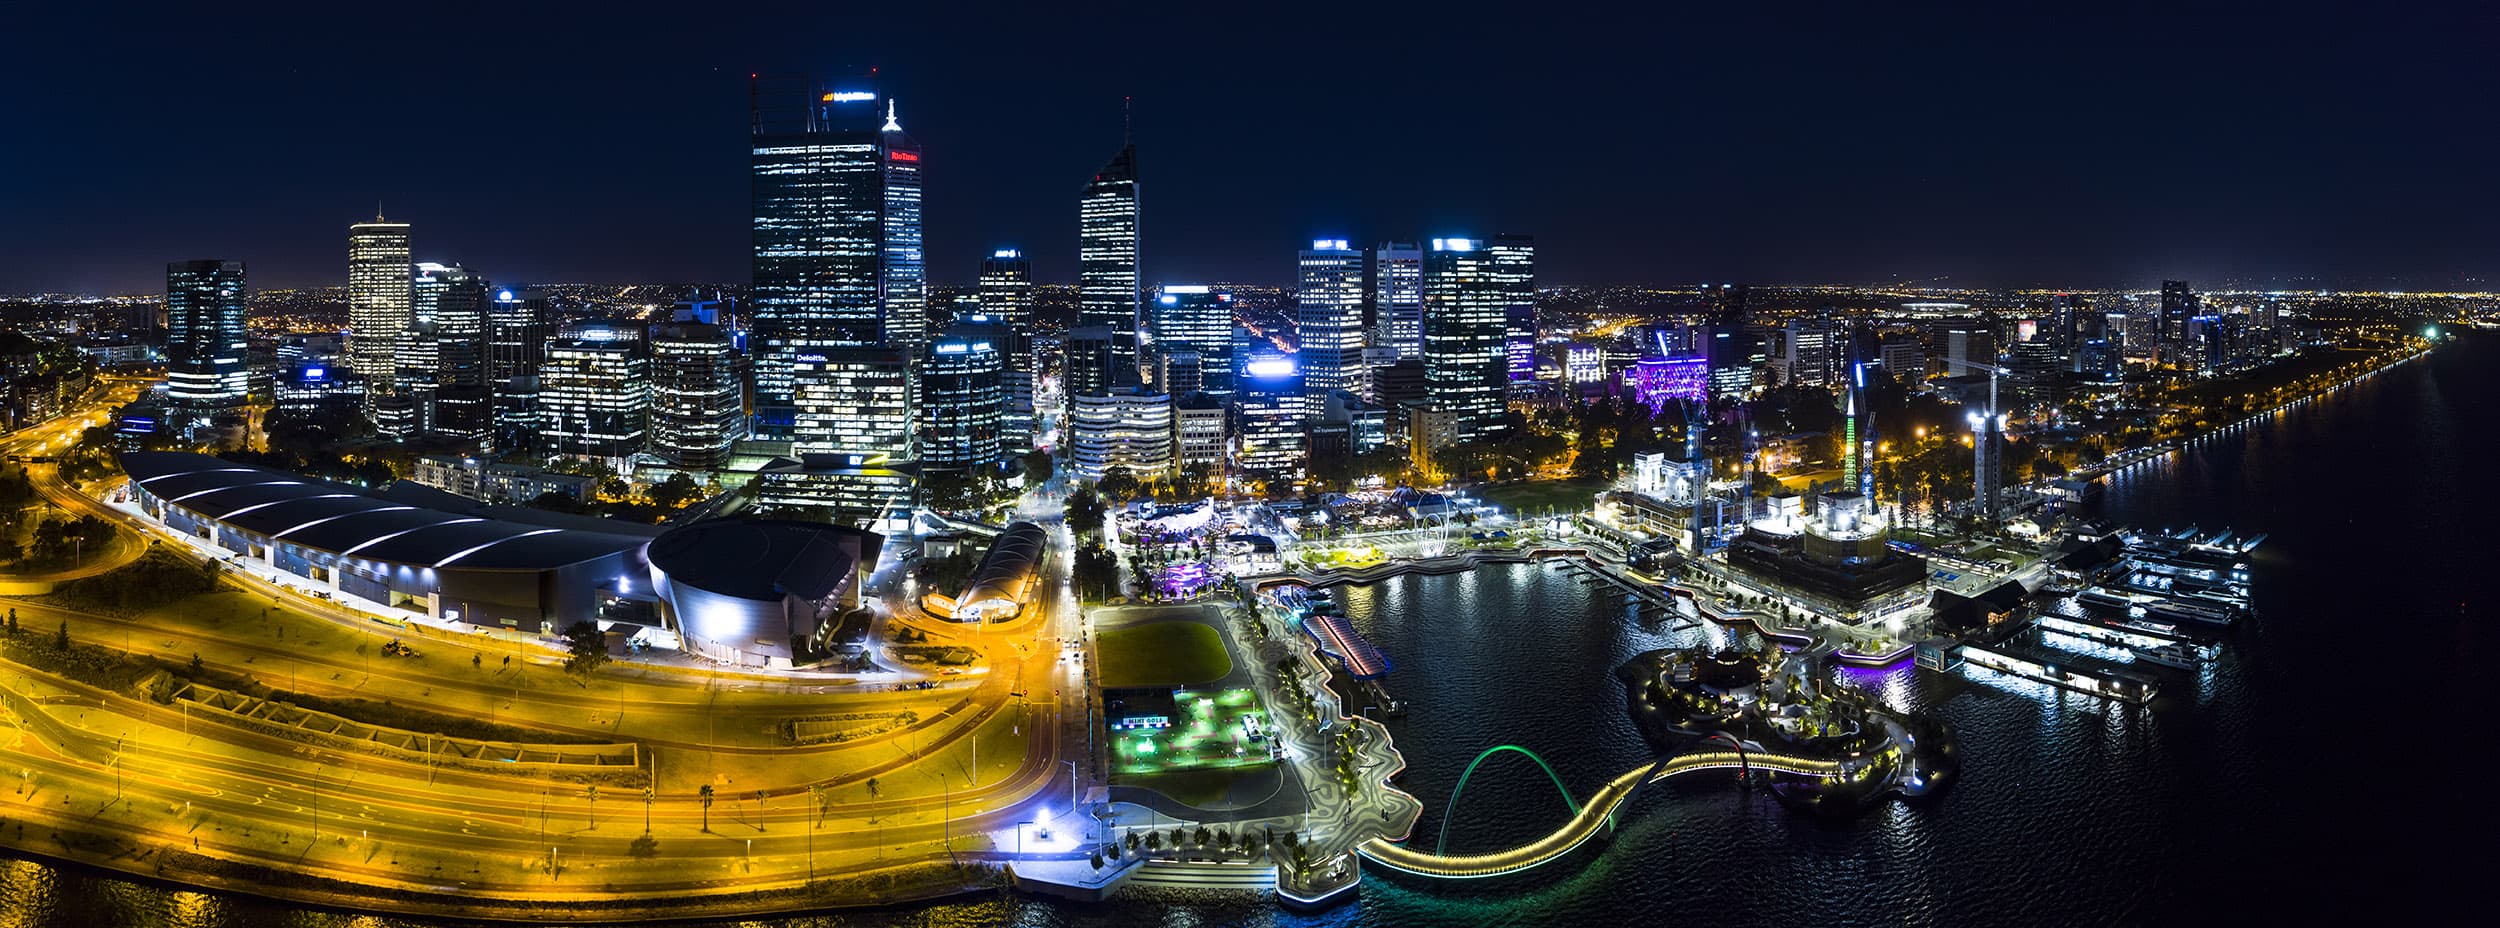
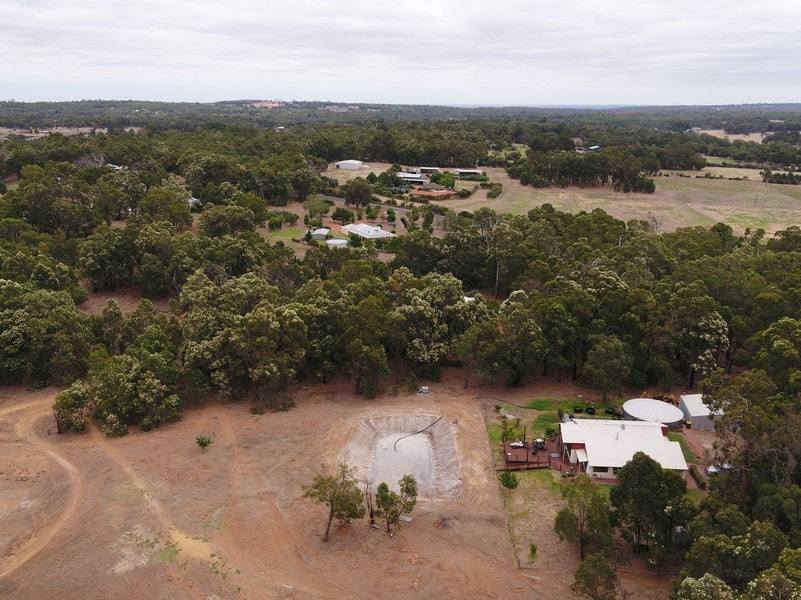
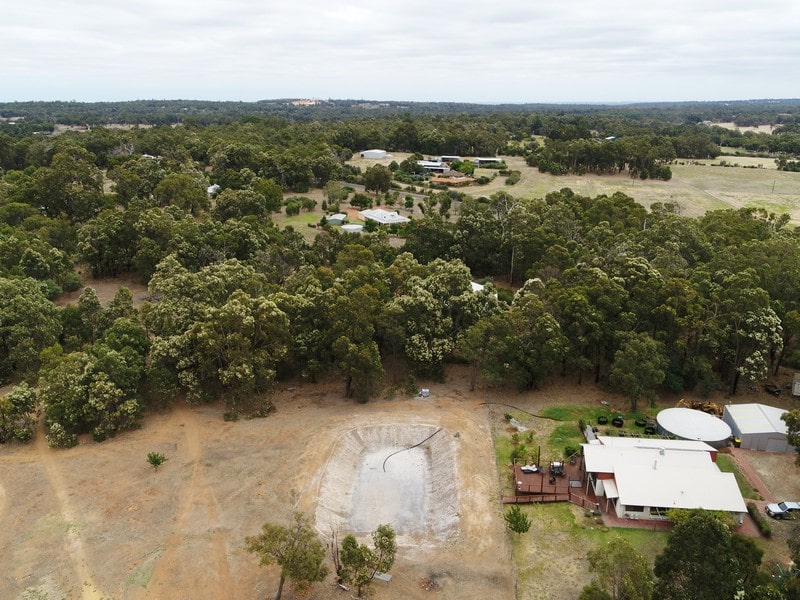
We had a chance to take the X7 out to capture golden hour and full night photos in our City of Perth and I must say this has really sold the camera for me. The night performance is simply amazing. We were able to capture photos at 400 ISO that were crisp and had very little noise. The conditions were not perfect and even with a fair bit of wind the gimbal was stable enough for some fairly slow shutter speeds. Even at higher ISO for video we didn’t see a lot of noise in the footage at all. See some edited samples below. The start of our services video has the night video footage which can be found at aerial photography perth

X7 VS X5S
We took a photo pair to compare the X7 and X5S. In terms of clarity and detail you wont find much difference between the two cameras. The additional 4 megapixel are not noticeable even when viewing at 100% + What I did find interesting is the difference in the colors. Even though these were taken with the same white balance setting the pictures look vastly different. Colours looked much more real to life on the X7 and they seem contrast more making for a much better looking image in my opinion. These are two JPG images straight of the camera just resized. X5S first followed by the X7.
X5S Image
X7 Image
CONCLUSION
Technical issues aside I believe this is a great camera. If I already had an X5S I probably wouldnt spend the money on the upgrade especially when you consider replacing all your lenses. If you are in the market for a new camera and don’t have a stock of micro 4/3 lenses however this is a great investment. It will give you high quality images in a compact and friendly Inspire 2 package with 20 minute flight times. Its easy to use, you can adjust all the settings on the fly, ultimate stability and it now takes a really good photo.